









How to Install Downlights in Concrete Ceiling: A Complete Step-by-Step Guide
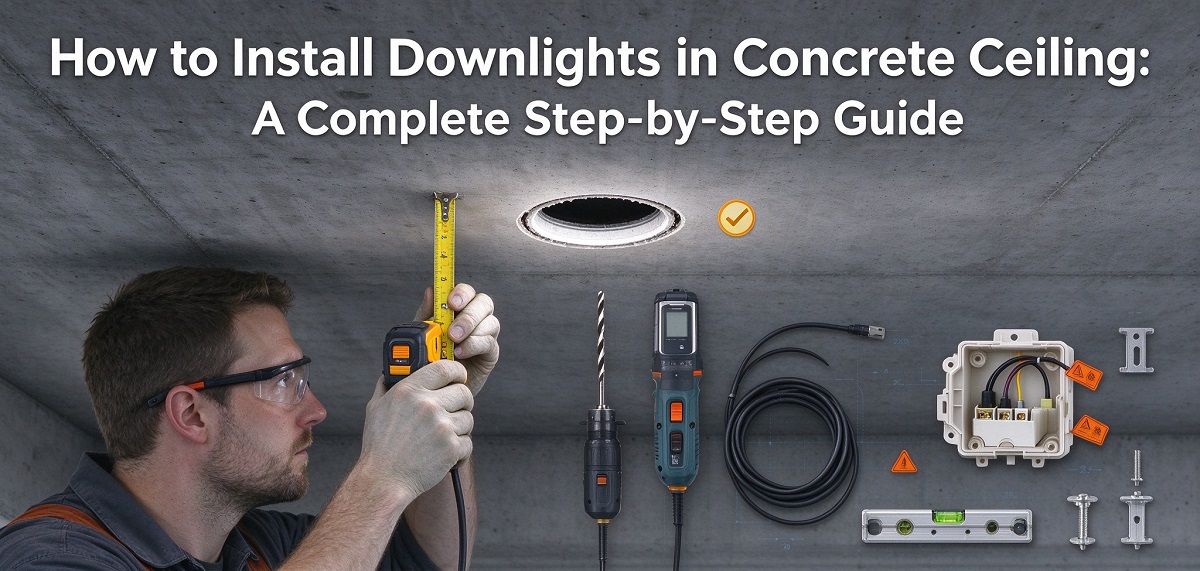
Installing downlights in a concrete ceiling is different from installing recessed lighting in drywall or plasterboard. Concrete is much harder, structural reinforcement may be hidden inside the slab, and there is usually less space available for wiring and LED drivers.
For homeowners, contractors, electricians, lighting distributors, and project buyers, understanding the correct installation method is essential for achieving a secure, clean, and reliable lighting system.
In this guide, we explain how to install downlights in a concrete ceiling, from planning and choosing the right fixture to drilling, wiring, fixing, testing, and avoiding common installation mistakes.
Important: Electrical work and structural drilling should comply with local building and electrical regulations. Where required, installation should be completed by a qualified electrician or professional contractor.
Can You Install Downlights in a Concrete Ceiling?
Yes, you can install downlights in a concrete ceiling, but the installation method needs to be carefully planned.
Unlike drywall or suspended ceilings, solid concrete cannot simply be cut and fitted with conventional spring-clip downlights. Before you install downlights, you need to consider the concrete structure, reinforcement, electrical wiring, ceiling thickness, cut-out dimensions, driver location, and fixing method.
Concrete ceilings are commonly found in:
- Residential apartments
- Villas
- Hotels
- Offices
- Retail stores
- Restaurants
- Commercial buildings
- Showrooms
For new construction projects, it is generally easier to plan wiring and recessed lighting locations before the concrete structure is completed.
For existing buildings, installation requires more careful inspection and specialized drilling equipment.
Why Installing Downlights in Concrete Is Different
There are several major differences between concrete and conventional suspended ceilings.
First, concrete is structurally strong and difficult to drill. Second, reinforcement bars, electrical cables, conduits, or pipes may be hidden inside the structure.
There may also be limited space above the ceiling for the LED driver and wiring.
Most importantly, many recessed downlights use spring clips designed for plasterboard or drywall. These clips may not provide a reliable fixing method when installing a fixture directly into solid concrete.
Therefore, choosing a downlight with an appropriate installation structure is one of the first steps toward a successful project.
What You Need Before You Install Downlights
Good preparation can prevent expensive mistakes later. Before drilling the first hole, confirm the ceiling structure, lighting layout, fixture specifications, and installation method.
Essential Tools for Concrete Ceiling Installation
Depending on the project, you may need:
- Hammer drill
- Diamond core drill or concrete hole cutter
- Appropriate concrete drill bits
- Rebar detector
- Cable detector
- Measuring tape
- Spirit level
- Marker or pencil
- Voltage tester
- Screwdrivers
- Safety goggles
- Gloves
- Dust mask
- Vacuum cleaner
For commercial projects, professional concrete drilling equipment may be required, especially when multiple downlights need to be installed.
Materials and Components
Typical installation materials include:
- LED downlights
- LED drivers
- Electrical cables
- Conduits where required
- Junction boxes
- Screws
- Expansion anchors
- Mounting brackets or fixing accessories
The exact materials depend on the fixture design and local electrical requirements.
How to Choose the Right Downlights for a Concrete Ceiling
Choosing the right fixture before installation is just as important as the installation itself.
Check the Downlight Cut-Out Size
Every recessed downlight has a specified cut-out diameter or opening dimension.
For example, different models may use different cut-out sizes depending on their housing diameter and design.
Always use the manufacturer's specified cut-out dimension rather than measuring only the outside diameter of the trim.
An incorrectly sized opening can result in:
- Loose installation
- Visible gaps
- Poor appearance
- Difficult fixture alignment
- Additional ceiling repair work
Fitlight offers multiple LED downlight sizes and configurations for different project requirements, allowing lighting buyers and contractors to select products according to their ceiling layout and application.
Check the Downlight Depth
Concrete ceiling projects also require attention to the fixture depth and driver position.
Before you install downlights, make sure there is sufficient space for:
- The LED housing
- Driver
- Electrical connections
- Heat dissipation
- Maintenance access where necessary
Do not force a driver or cable into a space that is too small.
Check Wattage and Light Output
The right wattage depends on the room size, ceiling height, application, beam angle, required illuminance, and fixture efficiency.
For example, general residential lighting may require a different lighting configuration from a retail store or hotel project.
Rather than selecting the highest wattage available, professional lighting design should focus on achieving the required light level with appropriate fixture spacing and optical performance.
Consider Beam Angle and Anti-Glare Performance
Beam angle has a major influence on the final lighting effect.
A wider beam angle can provide more uniform general lighting, while a narrower beam can be useful for accent or focused lighting.
Anti-glare performance is also important in offices, hospitality spaces, retail stores, and other environments where occupants spend significant time under artificial lighting.
How to Plan the Downlight Layout
Before you install downlights, create the lighting layout first.
Determine the Number of Downlights
The number of fixtures should be based on:
- Room dimensions
- Ceiling height
- Required illuminance
- Lumens per fixture
- Beam angle
- Fixture efficiency
- Application
- Surface reflectance
There is no single number of downlights that works for every room.
For commercial projects, a professional lighting simulation is recommended before installation.
Decide the Spacing Between Downlights
Downlight spacing affects lighting uniformity.
If fixtures are installed too far apart, dark areas may appear between them. If they are installed too close together, the project may use more fixtures and energy than necessary.
The ideal spacing should be considered together with ceiling height, beam angle, lumen output, and the required lighting level.
Mark Every Downlight Position
Once the layout is confirmed:
- Measure the ceiling.
- Mark the center of every fixture.
- Check the alignment between fixtures.
- Confirm the required cut-out size.
- Check for structural reinforcement and hidden services.
- Confirm that the proposed position is suitable for drilling.
Taking time during this stage can prevent unnecessary concrete drilling and ceiling repairs.
How to Install Downlights in Concrete Ceiling Step by Step
Now let's look at the actual installation process.
Step 1 – Turn Off the Power
Before working on electrical wiring, switch off the relevant circuit breaker.
Do not rely only on the wall switch.
Use an appropriate voltage tester to verify that the circuit is de-energized before starting electrical work.
For commercial or multi-circuit buildings, follow the applicable lockout and electrical safety procedures.
Step 2 – Check for Rebar, Electrical Wiring and Pipes
This is one of the most important steps when you install downlights in concrete.
Before drilling, inspect the proposed location for:
- Reinforcement bars
- Electrical cables
- Water pipes
- HVAC components
- Embedded conduits
- Structural beams
A suitable detector can help identify potential obstacles.
Never assume that an apparently empty area is safe to drill.
If the structural condition cannot be confirmed, consult a qualified professional or structural engineer before proceeding.
Step 3 – Mark the Downlight Cut-Out
Use the manufacturer's specified cut-out dimension.
For example, if a fixture requires a specific recessed opening, the hole should be made according to that specification rather than simply cutting a hole based on the visible trim diameter.
A template can help maintain consistent dimensions across multiple fixtures.
Before drilling, check the following:
- Correct center position
- Correct hole diameter
- Correct fixture orientation
- Sufficient clearance
- No structural conflicts
Step 4 – Drill and Cut the Concrete Ceiling
For concrete ceilings, a suitable diamond core drill or concrete cutting tool may be required.
A typical process is:
- Position the drilling equipment accurately.
- Start the pilot hole if required.
- Use the correct diamond core bit.
- Keep the drill aligned with the marked position.
- Cut the opening carefully.
- Remove concrete debris and dust.
- Inspect the opening.
Avoid enlarging the opening excessively just to make installation easier.
A clean and accurately sized opening makes it easier to achieve a professional finished appearance.
Step 5 – Prepare the Wiring and LED Driver
After the opening is prepared, organize the electrical wiring and determine where the LED driver will be positioned.
Make sure:
- The wiring is properly protected.
- Connections comply with local regulations.
- The driver has adequate ventilation.
- Cables are not excessively bent or compressed.
- There is no unnecessary pressure on the fixture.
The driver is an important component of an LED lighting system. A high-quality driver can contribute to stable operation, reliable dimming, and consistent lighting performance.
For B2B lighting projects, buyers should consider driver brand, electrical specifications, dimming compatibility, and certification requirements when selecting downlights.
Step 6 – Connect the LED Downlight
Connect the LED downlight according to the manufacturer's wiring instructions.
Typical electrical connections may include:
- L — Live
- N — Neutral
- E — Earth/Ground, where applicable
The exact wiring arrangement depends on the product design and local electrical regulations.
If the project uses dimming, smart lighting, or a specific control system, confirm compatibility before installation.
Fitlight downlight solutions can support different control systems depending on the model, including TRIAC, 0–10V, DALI and smart control options.
Step 7 – Secure the Downlight to the Concrete Ceiling
This is where installing downlights in concrete differs significantly from installing them in drywall.
Why Standard Spring Clips May Not Work
Many recessed LED downlights are designed with spring clips that clamp against the back of a plasterboard ceiling.
This works well when there is a suitable ceiling board thickness and sufficient space above the ceiling.
A solid concrete ceiling does not provide the same installation conditions.
Therefore, do not assume that a standard spring-clip fixture can simply be pushed into a concrete opening.
Use the Appropriate Fixing Method
Depending on the downlight design and project structure, suitable fixing methods may include:
- Expansion anchors
- Mounting brackets
- Mechanical fixing structures
- Dedicated mounting bases
- Other manufacturer-approved fixing systems
The exact method should be determined by the fixture design, ceiling structure, fixture weight, and local building requirements.
The fixture should be firmly secured without damaging the concrete or excessively compressing the downlight housing.
Step 8 – Align the Downlight
After the fixture is secured, check its position carefully.
The downlight should:
- Sit evenly against the ceiling
- Have no obvious gaps
- Remain level
- Have no visible tilting
- Be securely fixed
For projects with multiple downlights, alignment is especially important.
Even small differences in position can become visually noticeable when dozens of fixtures are installed in a commercial space.
Step 9 – Turn on the Power and Test the Lighting
After installation is complete, restore power and test each fixture.
Check for:
- Normal light output
- Flickering
- Uneven illumination
- Abnormal noise
- Driver performance
- Dimming operation
- Fixture stability
- Correct color temperature
If any abnormal condition occurs, switch off the circuit and investigate the cause before continuing operation.
Common Mistakes When You Install Downlights in Concrete Ceilings
Avoiding installation mistakes is especially important for commercial lighting projects because correcting incorrectly drilled concrete ceilings can be costly.
Drilling Without Checking the Ceiling Structure
Never drill first and investigate later.
Rebar, electrical cables, pipes, and structural components must be considered before drilling.
Using the Wrong Cut-Out Size
A hole that is too large can make the fixture difficult to secure.
A hole that is too small may damage the fixture or make installation impossible.
Always follow the manufacturer's cut-out specification.
Using Standard Spring Clips on Solid Concrete
Spring clips designed for drywall are not automatically suitable for concrete ceilings.
Use the fixing system recommended for the specific downlight.
Leaving No Space for the Driver
A driver should not simply be squeezed into an unsuitable space.
Poor installation conditions can affect heat dissipation and long-term reliability.
Ignoring Heat Dissipation
LED downlights generate heat during operation.
The fixture and driver should be installed according to the manufacturer's requirements to maintain appropriate thermal performance.
Installing Too Many Downlights
More fixtures do not necessarily mean better lighting.
A properly designed lighting layout should balance:
Illuminance + uniformity + glare control + energy efficiency + aesthetics.
Ignoring Dimming Compatibility
If the project requires dimming, make sure the downlight and driver are compatible with the selected control system before ordering and installing the fixtures.
Recessed vs Surface Mounted Downlights for Concrete Ceilings
Not every concrete ceiling is suitable for recessed installation.
| Feature | Recessed Downlight | Surface Mounted Downlight |
|---|---|---|
| Ceiling Cutting | Required | Usually minimal |
| Installation | More complex | Generally easier |
| Appearance | Flush appearance | Surface-mounted |
| Concrete Ceiling | Suitable with proper preparation | Very suitable |
| Ceiling Space | More important | Less restrictive |
| Renovation Projects | Can be challenging | Often more convenient |
If the concrete ceiling has limited available depth or drilling is difficult, a surface-mounted downlight may be a more practical alternative.
The final decision should be based on the project structure, lighting requirements, aesthetics, and installation conditions.
Where Are Concrete Ceiling Downlights Commonly Used?
Concrete ceiling downlights are widely used in both residential and commercial projects.
Residential Projects
Common applications include:
- Living rooms
- Kitchens
- Bedrooms
- Hallways
- Apartments
- Villas
Commercial Buildings
Downlights are also widely used in:
- Offices
- Retail stores
- Shopping malls
- Restaurants
- Hotels
- Showrooms
Hospitality and Architectural Projects
For higher-end applications, recessed LED downlights can provide a clean ceiling appearance while supporting controlled and comfortable illumination.
Depending on the fixture specification, features such as high CRI, anti-glare optics, multiple beam angles, dimming, and IP protection can be selected according to the project requirements.
Fitlight's recessed downlight portfolio includes options designed for residential, commercial, retail, hospitality, office, and other indoor applications.
How to Choose a Reliable LED Downlight Manufacturer
For contractors, distributors, lighting brands, and project companies, choosing the right manufacturer is just as important as selecting the right product.
Consider the following factors before placing a bulk order.
Product Certifications
Depending on the target market, buyers may need documentation such as:
- CE
- RoHS
- EMC
- LVD
- SAA
- CB
- ISO 9001
The specific certification requirements depend on the product and destination market.
Fitlight provides relevant certification documentation for applicable LED lighting products, including CE-EMC, CE-LVD, RoHS, SAA and ISO 9001 documentation.
OEM and ODM Capability
Lighting brands and project companies may require customization of:
- Wattage
- CCT
- CRI
- Beam angle
- Housing color
- Trim finish
- Logo
- Packaging
- Dimming system
A manufacturer with in-house engineering and production capabilities can make this process more efficient.
Stable Production Capacity
For large projects, consistent production and quality control are critical.
Fitlight states that its Dongguan facility has more than 3,000 m² of factory space, 200+ workers, four production lines and a daily output of more than 10,000 pieces.
This type of production capability can be particularly important for distributors and contractors handling repeat orders or large-scale projects.
Frequently Asked Questions About Installing Downlights
Can you install recessed downlights directly into a concrete ceiling?
Yes, but the installation method must be appropriate for the concrete structure. The ceiling needs to be checked before drilling, and the downlight must have a suitable fixing method.
Can you install downlights without a false ceiling?
Yes. Recessed downlights can sometimes be installed directly into a concrete ceiling when there is sufficient depth and the structure allows safe drilling and wiring.
Surface-mounted downlights are another option when recessed installation is impractical.
What drill is needed to install downlights in concrete?
Depending on the project and fixture size, a concrete core drill or diamond core drilling equipment may be required.
The correct tool depends on the concrete hardness, opening size, installation environment, and project requirements.
How big should the hole be for a recessed downlight?
The opening should match the manufacturer's specified cut-out size. Do not use the outside trim diameter as a substitute for the required cut-out dimension.
Can spring clips be used in a concrete ceiling?
Standard spring clips are generally designed for ceilings such as plasterboard or drywall. They should not automatically be used as the primary fixing method for solid concrete.
How do you run wires for downlights in a concrete ceiling?
Wiring should be planned according to the building structure and local electrical regulations. In new construction, conduits and wiring can often be planned before the concrete structure is completed. Existing concrete ceilings require more careful planning.
Should a professional electrician install downlights?
Electrical installation should follow local regulations. Where electrical work requires a licensed or qualified professional, the installation should be completed by an appropriately qualified electrician.
Final Checklist Before You Install Downlights
Before completing your concrete ceiling downlight project, check:
- ✓ Ceiling structure has been inspected
- ✓ Rebar and hidden services have been checked
- ✓ Downlight positions have been confirmed
- ✓ Correct cut-out dimensions have been confirmed
- ✓ Suitable drilling equipment is available
- ✓ Electrical power has been isolated before wiring
- ✓ Driver location has been considered
- ✓ Correct fixing method has been selected
- ✓ Downlights are properly aligned
- ✓ Electrical connections have been checked
- ✓ Dimming compatibility has been confirmed if required
- ✓ Every fixture has been tested after installation
Choose the Right LED Downlights for Your Project
Installing downlights in a concrete ceiling requires more planning than a standard drywall installation. The key is to consider the ceiling structure, cut-out size, fixing method, wiring, driver position, thermal performance, optical design, and electrical requirements before installation begins.
For lighting distributors, contractors, project companies, and lighting brands, choosing a reliable manufacturer can also make the installation process easier by providing accurate product specifications, installation instructions, technical documentation, and customization support.
Fitlight Lighting's LED Downlight Solutions are designed for residential and commercial indoor lighting applications, with options covering different sizes, optical designs, dimming systems and project requirements. Fitlight is a professional LED lighting manufacturer with more than 14 years of industry experience and provides OEM/ODM services for global B2B customers.
If you are sourcing LED downlights for a new project, distribution business, or private-label lighting brand, you can request product specifications, samples, certification documents, and a project quotation from Fitlight.
Looking for reliable LED downlights for your next project? Contact Fitlight Lighting to discuss your requirements and find the right solution for your market.